How to set the assistance level
SETTING THE ASSISTANCE LEVEL
To use your ebike, first turn it on by holding down the power button which is located on the handlebar display.
Once activated, you can use the plus (+) and minus (-) buttons on the keypad to alter the level of assistance that the bike gives you while riding.
The higher the number the more assistance the bike will give you while riding. There are 5 assistance levels for you to chose from. We strongly recommend starting off on level 1, 2 or 3 on your first ride, before using levels 4 and 5.
You can also ride without the electrical system on (assistance level 0), by pressing the minus (-) button when on level 1.
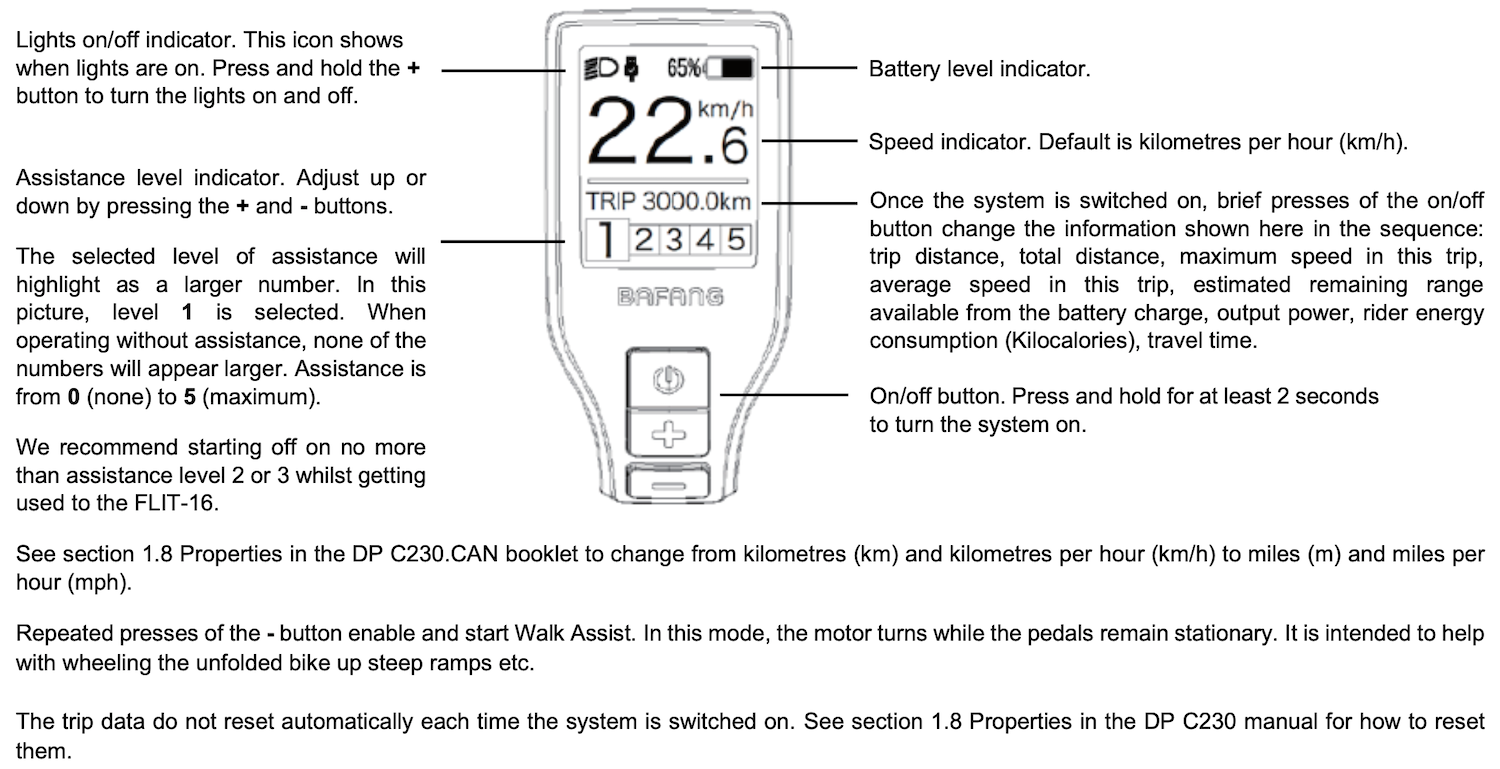
USING THE DISPLAY
Related Articles
The motor doesn't seem to always kick in instantly when you are already in motion - why is this?
You have to have your ebike set to level one assistance in order for the motor to kick in when you start to pedal. If you want to ride with no assistance, and still be able to switch the assistance on when riding, best thing to do is turn the system ...Why do I feel less assistance when the battery is less than 20%?
When the battery is <20% charged, it goes into “low power mode”, which means that you’ll feel slightly less assistance from the motor. The reason for this is that lithium ion batteries have a limit as to how much power can be drawn from the battery ...Why does my battery charge level decrease when not in use?
You many notice that the battery charge level can drop by up to 5% in the first 24hrs after a full charge when it is not in use. This is completely normal for lithium ion batteries. The reason for the discharge is mostly down to the battery ...How to use the display
PARTS OF THE DISPLAY TURNING THE EBIKE ON To use your ebike, first turn it on by holding down the power button which is located on the handlebar display. If the display does not turn on after pressing the power button, your battery may have gone ...How to adjust sensitivity or turn off automatic light functionality
If you’d rather manually operate your integrated lights, follow these instructions. You can also adjust the sensitivity if you’d like to keep them automatic, but find that they are turning on too frequently. First, turn your ebike on. Press and hold ...